This blog contains paid advertising banners and affiliate links. Banners and affiliate links may be used at no additional cost to you. This means I get paid a small commission when you shop with a company using a link I provide. I am not paid by any company to use their products (all products used in my posts have been purchased – by me) and should this ever happen, I will disclose that in a specific post.

Hi there! It’s time for another post. This time we are talking about glimmer and shine. I mean, who doesn’t like a little sparkle? Nothing overwhelming; just enough to give the card a little pizzazz.

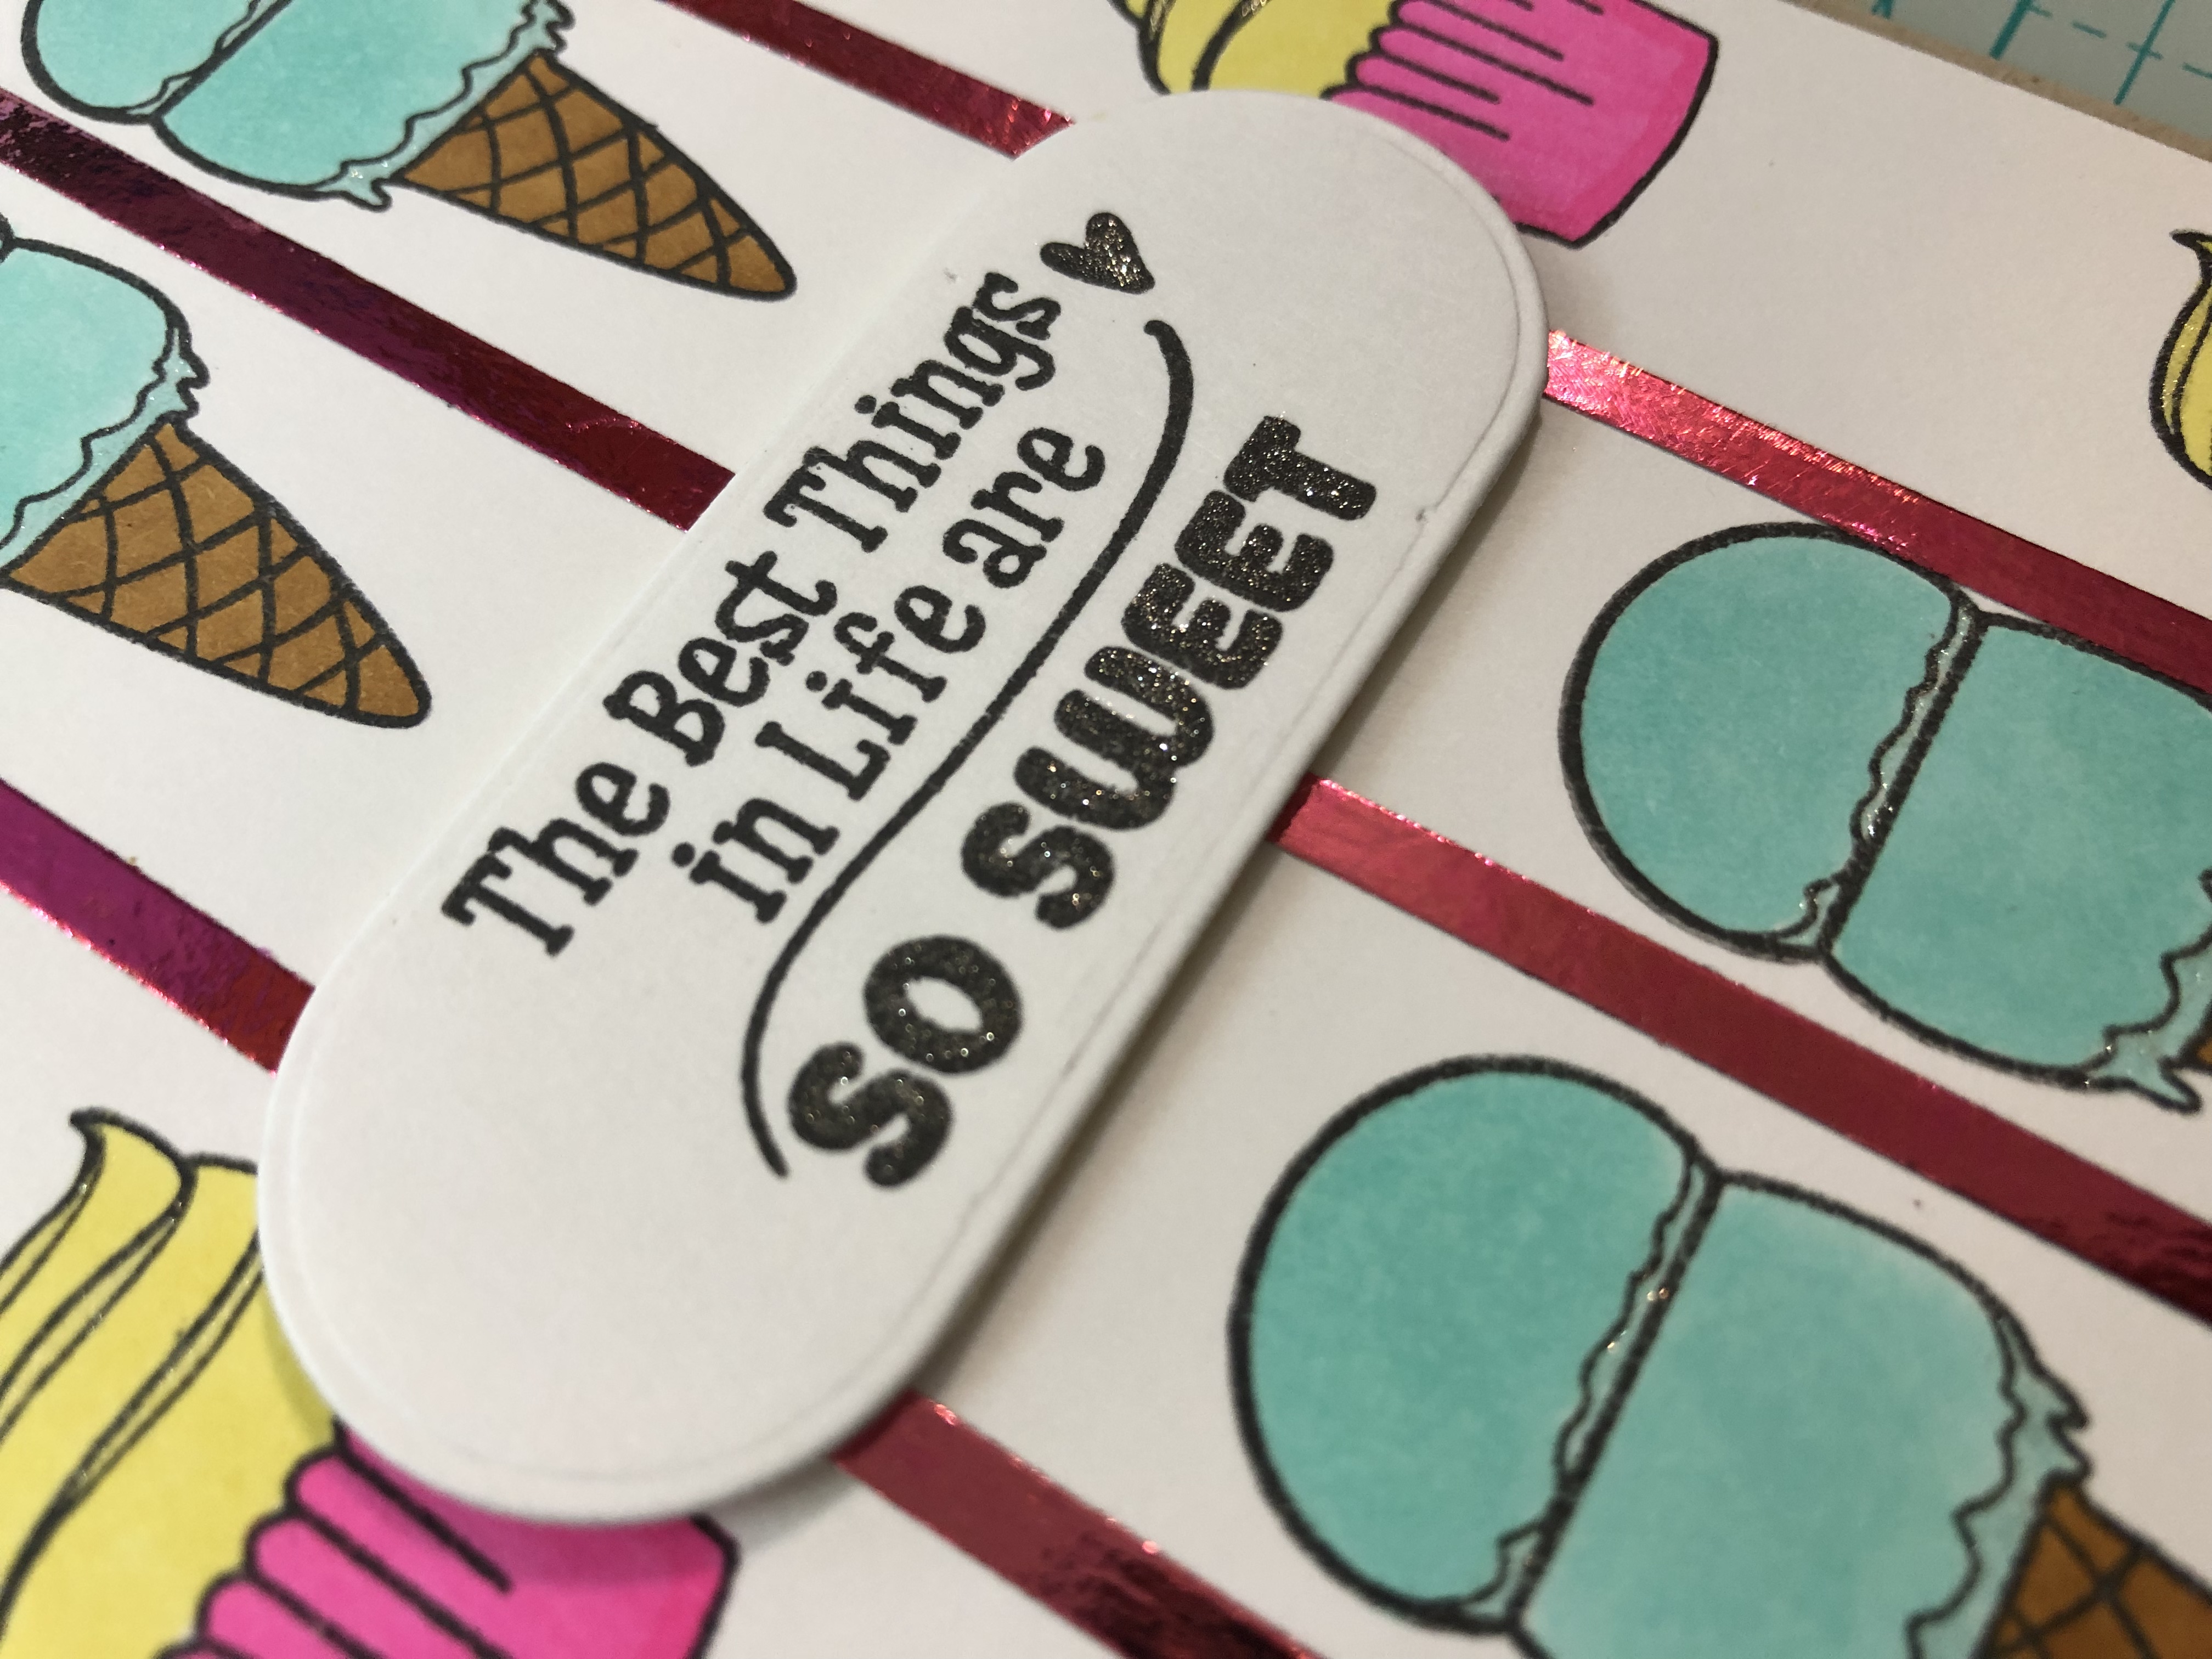
I started out by trimming a 4 1/4 in x 5 1/2 in piece of Neenah Classic Crest Solar White 110lb Cardstock down to 4 in x 5 1/4 in. Next I used my T – Ruler to measure out three vertical lines (each one inch apart).

My next step was to add three strips of 1/8 in Scor-Tape (double-sided adhesive) to the card front using the three vertical lines as my guide.

I chose iCraft Pink Melon deco foil to add “shine” to the card front. I cut three thin strips, removed the backing from the Scor-Tape and carefully placed each strip on to the tape, using my finger to carefully burnish the foil before peeling it back.

Next, I used an acrylic block to stamp my images (I used Altenew Permanent Black Ink).


Now to add color and shimmer to these sweet treats. I used Caliart alcohol based markers for color. The “shimmer” was added by applying small amounts of Clear Wink of Stella.


After adding foam tape to the back of the card front, I adhered it to a top folding card base cut from Neenah Desert Storm 100 lb card stock. The last step was to add my sentiment to the card.

There you have it folks. A quick and easy simple way to add glimmer, shine and a touch of sweetness to your day! Thanks for stopping by. Don’t forget to spread a little kindness! – Ouma

This is truly awesome, Takisha! Fabulous design and share! I love the bright colors that you chose. The placement of each stamped image is spot on! I am so glad that you enter your beautiful work in Altenew AECP assignment Gallery. Awesome details and design! Super work!
Thank you!
Great tutorial!!! Thanks for sharing!