When I was younger (through my teens) my FAVORITE color was blue. If it was blue I had to have it. Anything from the curtains in my room, to blue bathroom accessories, I even had blue glasses! I’m not sure where my affinity for the color came from. Maybe it was destiny, I mean I am a September baby and my birthstone is Sapphire which is one of the most beautiful shades of blue in existence.
The brilliant color Sapphire is the inspiration for this project. When I saw that Sapphire was one of the colors in the Altenew Glacier Caves ink family I had to have it!
This card is my ode to the color BLUE. Here we go!
This blog contains paid advertising banners and affiliate links. Banners and affiliate links may be used at no additional cost to you. This means I get paid a small commission when you shop with a company using a link I provide. I am not paid by any company to use their products (all products used in my posts have been purchased – by me) and should this ever happen, I will disclose that in a specific post.

This card is different than practically any card I have created. I used no stamps. Not one.
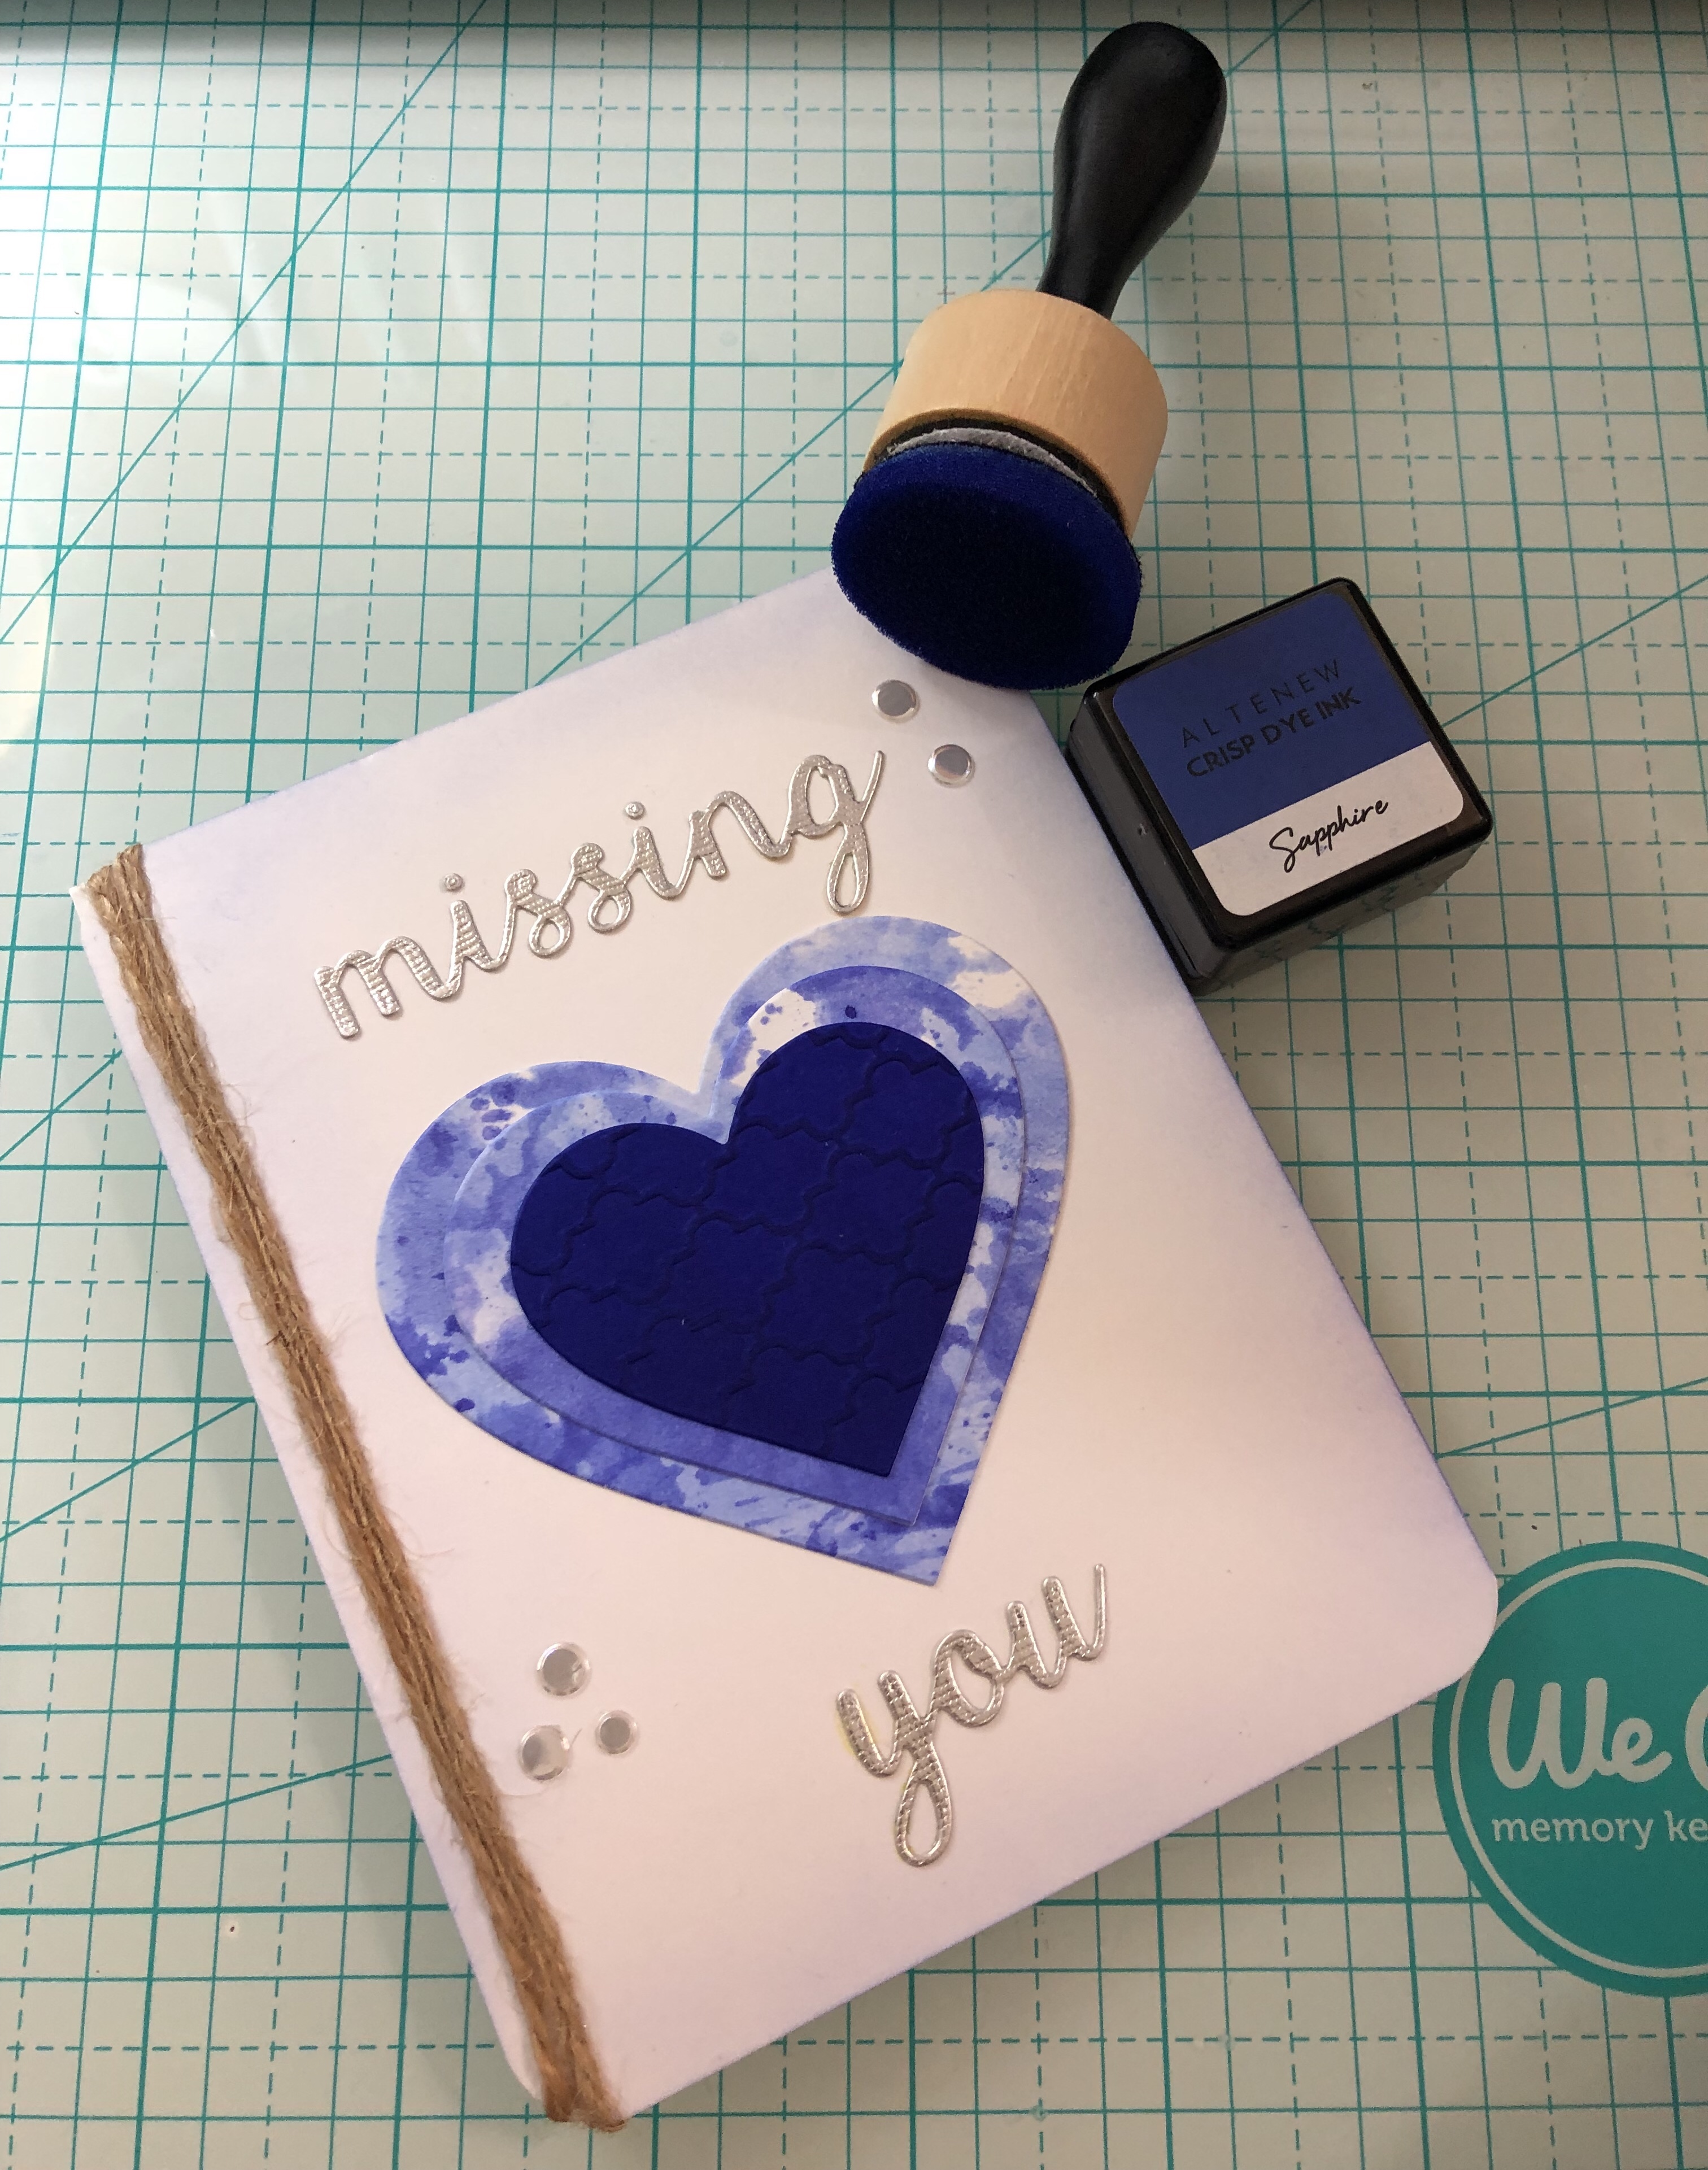
I started off with a piece of Neenah Classic Crest 110 lb card stock cut to 4 1/4 in x 5 1/2 in. Next, I used my Sapphire ink cube to rub a bit of ink onto my glass mat.

Water was added to the ink using a water brush pen.

Once I had a sufficient amount of water mixed with the ink, I placed a small acrylic block into the mixture. The acrylic block was then placed on to the card stock in random patterns.
Keep in mind that I took great care not to add to much water. This weight of card stock can handle water but it is not watercolor paper and it will warp (or tear) if it gets over saturated.

Stick with me – I know it looks like a hot mess right now but I promise there is a method to my madness. Once the entire sheet was covered I set it aside to dry for a few minutes.

While I waited for the first sheet to dry I embossed another piece of card stock (same dimensions as above) using my Cuttlebug and a Mosaic design embossing folder.

I used a mini ink blending tool to add color to the embossed card stock. I initially thought I would add additional shades of blue, but in the end I stuck with beautiful Sapphire.

I wanted an intense shade of blue so I went heavy on the ink (and pressure) used. Easing up a bit in certain spots for subtle variation.

I cut out several hearts using Hero Arts Nesting Hearts Infinity Dies and Die-namics Hearts in a Row Vertical die from My Favorite Things.

That brings me back to the hot mess. I used two of the My Favorite Things Heart Dies to cut out these beautiful hearts.

Using my mini ink blending tool, I used the remaining Sapphire ink from the embossed panel to add a subtle shadow to this panel.

The corners of the panel were rounded and then three hearts were layered on top of each other.


Clear sequins were added randomly around the panel.
The missing you sentiment was cut from Silver Silk Cardstock from the Tonic December Skies card pack. The die used to cut the sentiment came from the Simon Says Stamp Missing You set .

The final steps were adding three pieces of twine to the left side of panel, applying foam tape to the back and securing the panel to a top folding card.
There you have it. My ode to the BEAUTIFUL color Blue. I am awestruck by the brilliance of the color of the ink.
Thanks for stopping by. Don’t forget to spread kindness. – Ouma

By the way, if you are ready for the final challenge in Level 1, please e-mail me. Thank you!
Hi Virginia. Happy New Year to you. Hope it is starting of well. I believe I am ready. Should I use the same email address that we’ve been communicating through? AECP@Altenew.com
Love the intensity of colors! GREAT job on creating your own element pieces! Thanks so much for entering your beautiful work in Altenew AECP assignment Gallery. Beautiful colors and design. Well done!
Thank You!