Hello Friends! Happy Saturday. I am so happy that you took the time to stop by. We are now only 4 DAYS AWAY from the official start of SPRING!! I am SO EXCITED. I am in serious need of SUNSHINE.
Before I get into today’s card I’d like to give you a bit of a back story. I’ve always been drawn to crafts. If I saw a project that caught my eye I HAD TO TRY IT. In June of last year I was on YouTube and came across a video by Jennifer McGuire. She is an awesome card designer. Watching her videos GOT ME HOOKED. It was through her videos that I found Altenew. I made my first Altenew purchase in August. I fell in love with their products immediately. That is how I came across the Altenew Educator Certification Program. Even-though I was very new to stamping i thought I would give the program a try, I mean the worst that could happen is that they would tell me that I wasn’t quite ready and I’d have to try again. I applied in late September or early October. On November 7th, I received my ACCEPTANCE email and here we are!! Being accepted is one of the catalysts for the birth of this blog.
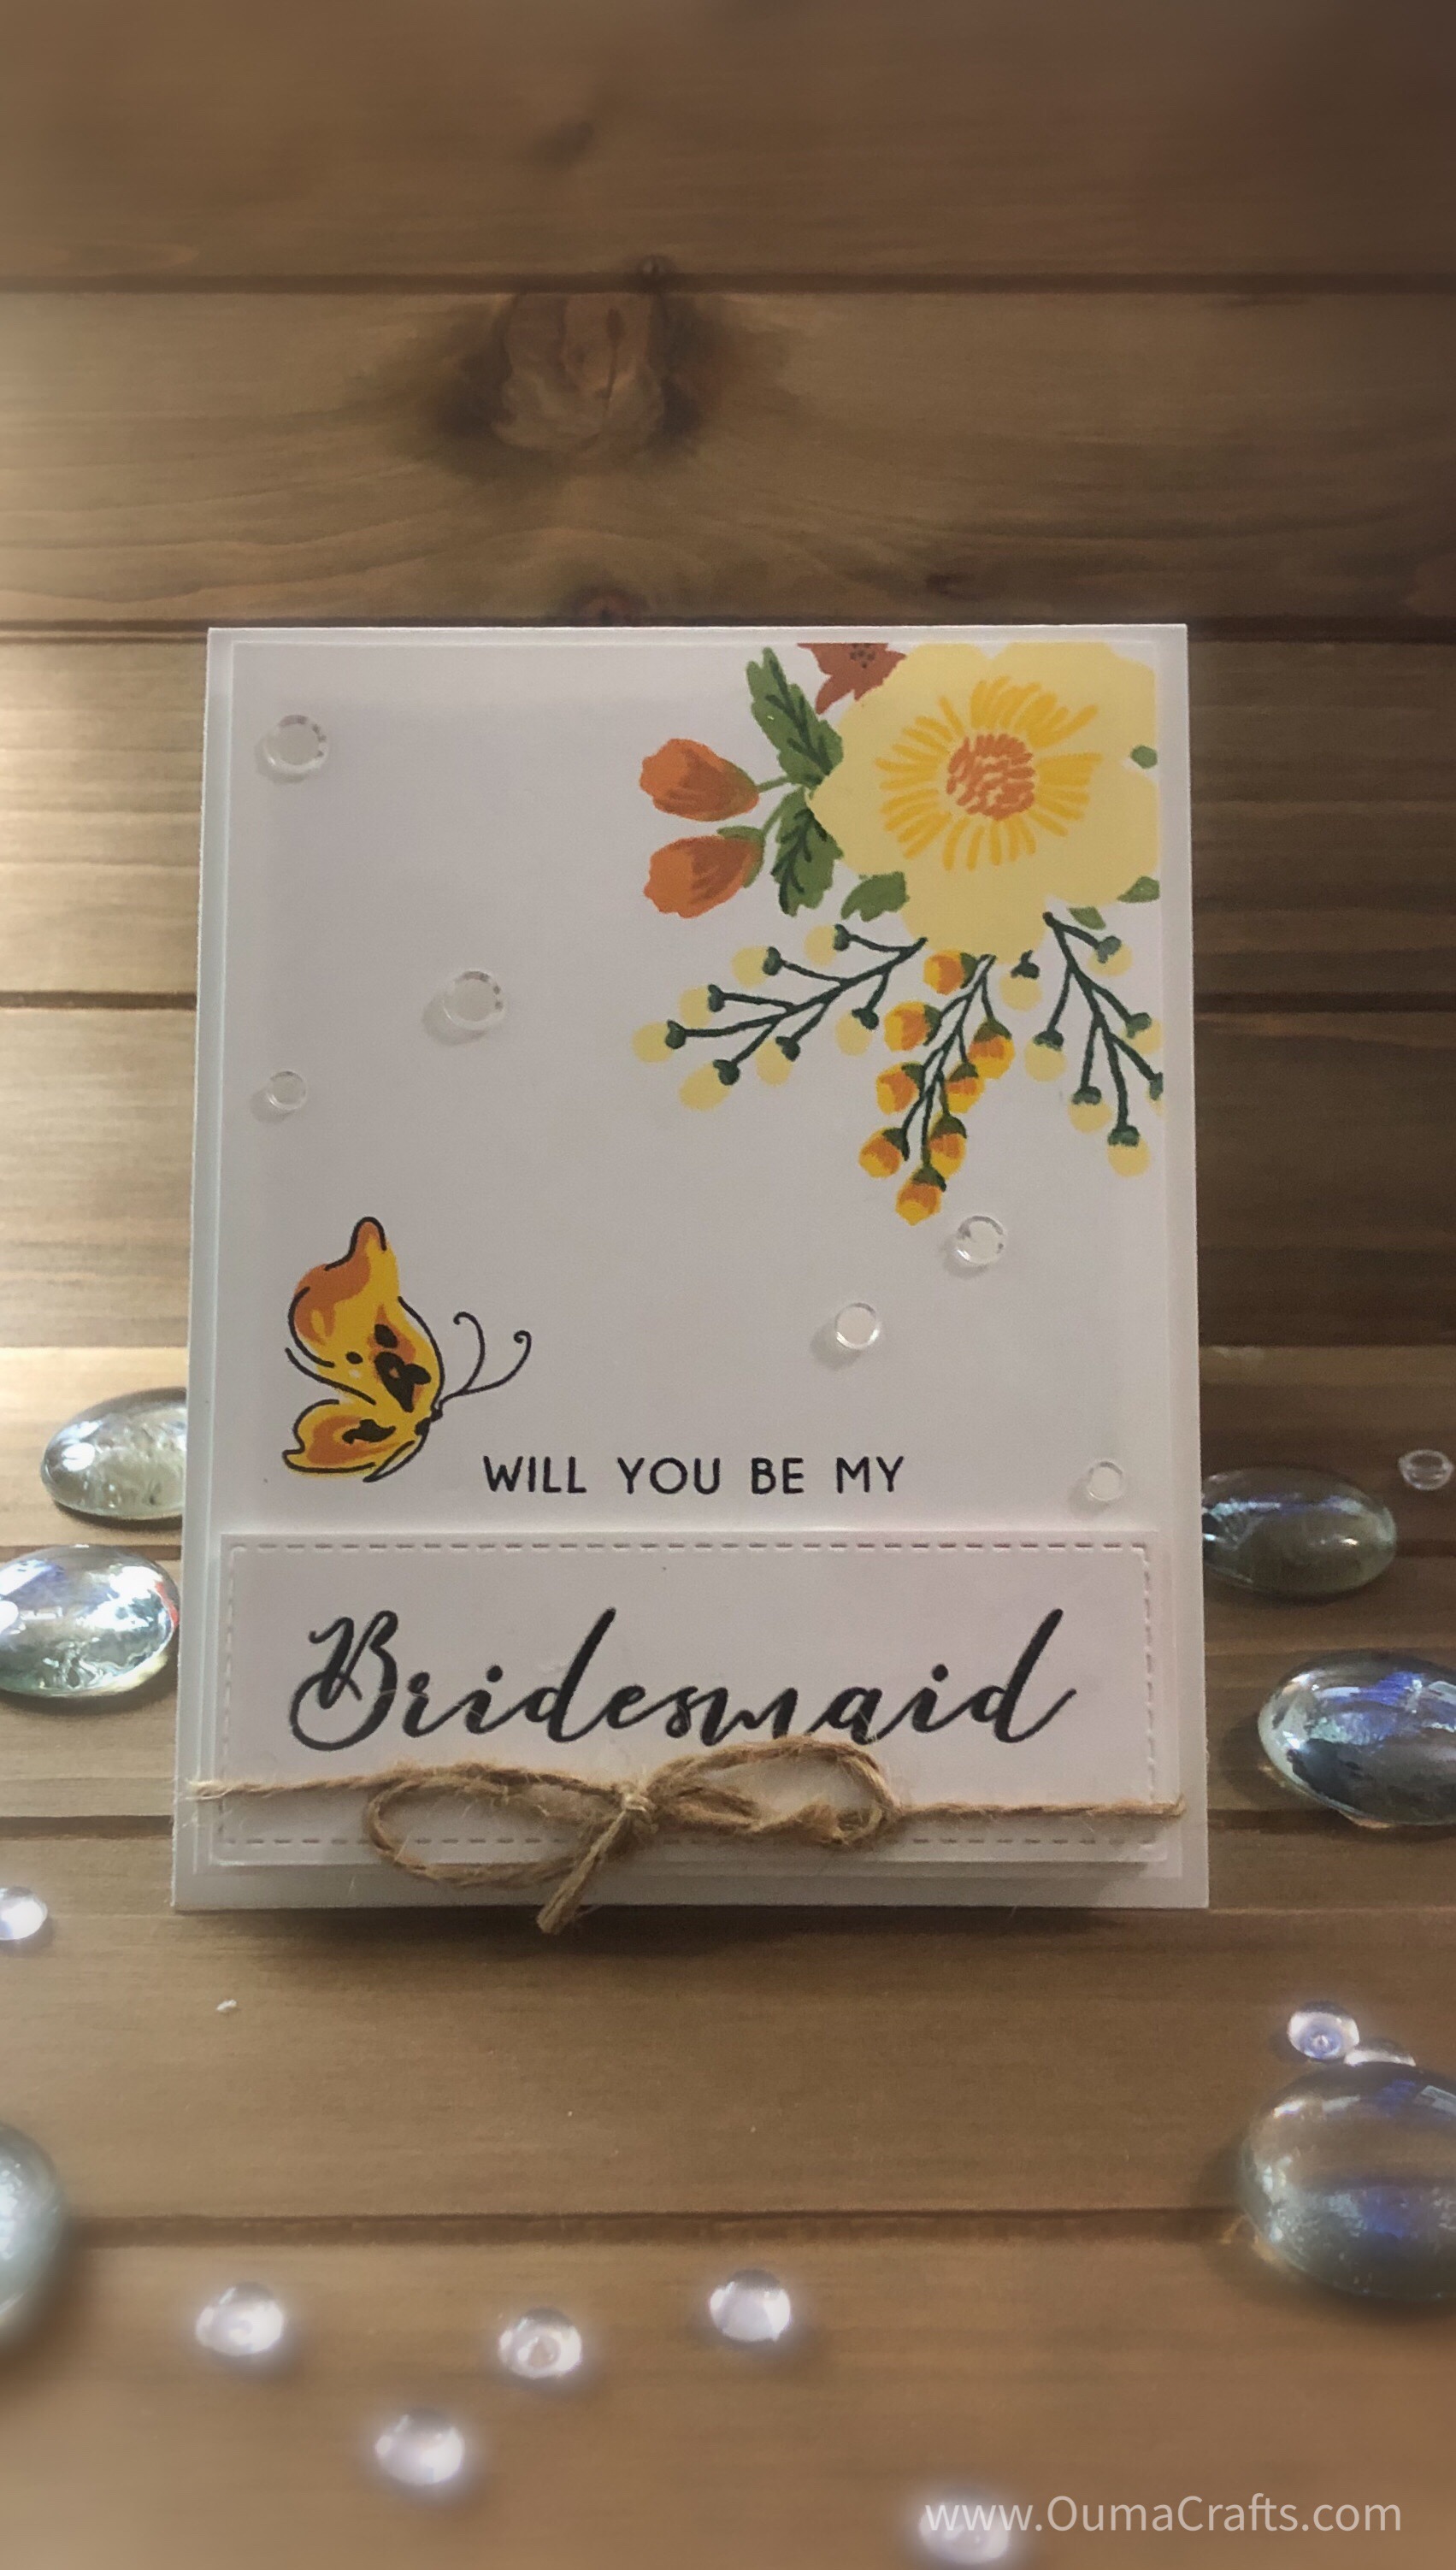
There are three levels that must be passed. Each has a “challenge” that has to be completed before moving on to the next. I have passed Level I and have one more project to complete before having to face my next challenge assignment. That brings me back to today’s card. This card came to fruition after participating in the Masking Unleashed course (part of the certification plan). It is a lovely Spring inspired Card (of course) with a simple and sweet message; Will You Be My Bridesmaid? Let’s dive in.
This blog contains paid advertising banners and affiliate links. Banners and affiliate links may be used at no additional cost to you. This means I get paid a small commission when you shop with a company using a link I provide. I am not paid by any company to use their products (all products used in my posts have been purchased – by me) and should this ever happen, I will disclose that in a specific post.

For today’s card I used two stamp sets. The first was the Bride to Be Stamp set that is part of the Beautiful Layered Florals Creativity Kit. The second set was the Painted Butterflies Stamp set – both shown below.


To start, I stamped the bottom layer of the flower (in Buttercream) onto a piece of card-stock 3 times (4 1/4 in x 5 1/2) using a stamp positioner. A stamp block could be used for this as well, however I prefer the precision of the platform.

The outer ring of the flower was stamped 3 times with Warm Sunshine.

The inner ring was also stamped 3 times using Caramel Truffle (don’t you just love that name) ink.

Here, I decided on the placement for my first stem of flowers. I wanted to make sure that I had the proper placement BEFORE moving to the next step.

Prior to starting the next steps, I used the coordinating flower die and cut out what would be used as a “mask“. For this I applied the die to a piece of regular printer paper which was then run through a die cutting machine. I find that thinner paper works best (for me) with this technique.
The mask was placed carefully over the stamped flower and secured with Washi Tape. Washi Tape is a great tool for securing masks. It is very thin so it doesn’t get in the way of the stamp AND it is low tack so it doesn’t leave residue on the card-stock below.
Next I applied Evergreen ink to the stamp in my positioner and applied it directly over the “mask” covering the stamped image.
The photos below show additional layers of leaves, stems and flowers being applied. All while leaving the mask in place.


Here you can see the final result. The beauty of using the masking technique is that it creates a more “lifelike” and “dimensional” image. The masking technique makes it appear as though the stems and flowers are in the background.

Once the flower was complete, I rotated the card so that the image was coming from the top corner. I stamped the Will You Be My sentiment from from the Bride to Be set directly on to the card using Permanent Black ink.

The outline of the butterfly was stamped with Permanent Black Ink. The next layer was filled (stamped in Warm Sunshine) in using the corresponding solid butterfly layer.

The butterfly image was completed by using the semi solid stamp to add color (Caramel Toffee) to the tips of the wings.

Bridesmaid was stamped onto a scrap piece of card-stock, covered with embossing ink followed by clear embossing powder. The image was cut using a square die (run through die cut machine).


The card was trimmed by 1/8 in on all for sides. White Craft foam was adhered to the back of the Bridesmaid strip and applied to the front of the card.
Another piece of White Craft foam was attached to the back of the the card. Before placing the card onto a top folding card base I wrapped a piece of twine around the bottom and tied it in a bow. I tried to capture the shimmer that I added to the butterfly and flowers. The pictures really don’t do it justice. They have a beautifully subtle shimmer that is picked every time light hits it. For the final touch I added clear sequins for additional shimmer.


I think this may be my favorite out of all the cards I’ve made. It is simple yet elegant and perfect for asking a close friend or family member to be a part of your special day.
Thank you for sticking around. I know this was not the shortest blog post, but I hope that you were inspired by something that you saw or read. Have a beautiful weekend and don’t forget to Spread Kindness! – Ouma

That is some gorgeous masking!! So crisp and clean. LOVE the project!
I am so glad that you entered your beautiful work in the AECP assignment Gallery. Thank you for sharing your creative process! Fabulous job!
Thank you 😊
Gorgeous! It looks painted! Great job!
Thank You!! 😊