Hello World!! Ouma here. I am back after an EXTREMELY long break from blogging. It’s been about six months since my last post. Geez Louise! The break was unintentional but absolutely needed.
This blog contains paid advertising banners and affiliate links (Shopping/Affiliate Disclosure). Banners and affiliate links may be used at no additional cost to you. This means that I may get paid a small commission when you shop with a company using a link I provide.
I am not paid by any company to use their products (all products used in my posts have been purchased – by me) and should this ever happen, I will disclose that in a specific post.
I am happy to be back though. Today I am sharing three cards that I created using Spellbinders Glimmer Kit of the Month (May and June 2020) and the June Large Die of the Month for May 2020. If you haven’t checked out Spellbinders Club Kits I recommend hopping over to their site and taking a peak. They have a wide variety of quality products, you can subscribe to one or try a bundle to save a few dollars (which makes me very happy).
These cards were fairly simple to put together since (the dies and foil plates did most of the heavy lifting). The most tedious part of assembling these cards was adding the flatback pearls and gems. Some of them are super tiny and were a bit difficult to place but all in all I am very happy with how everything turned out.

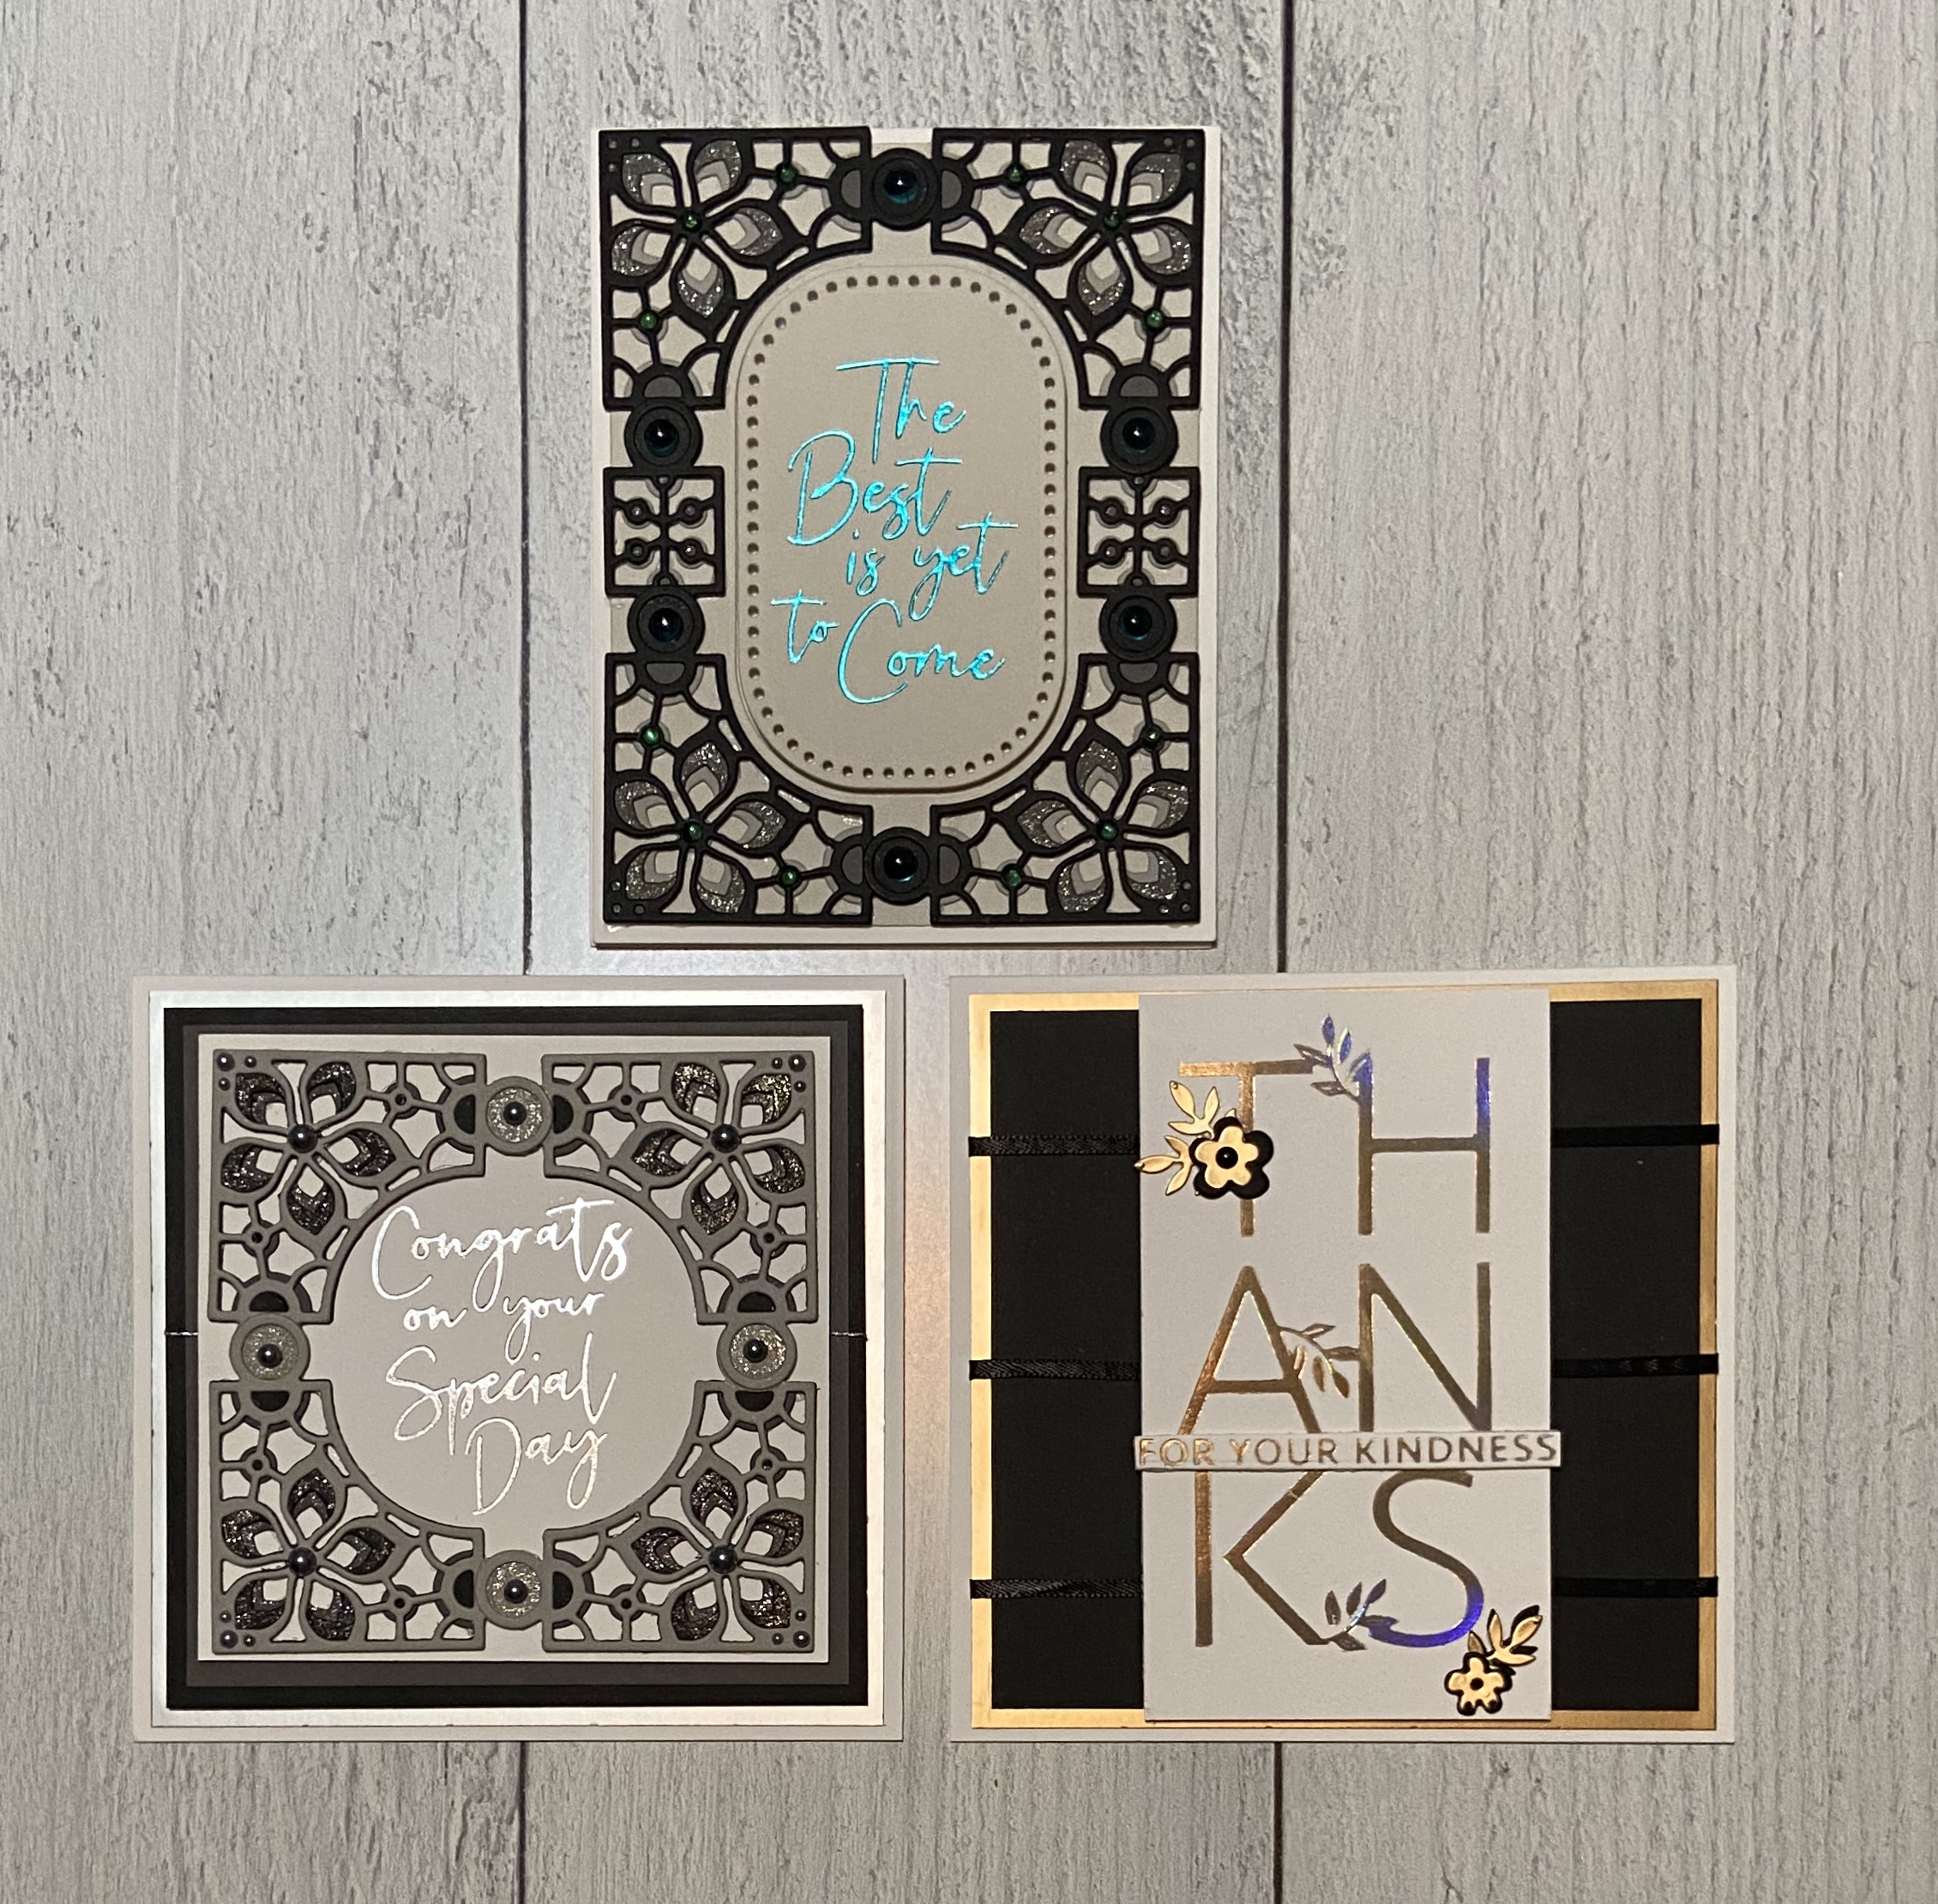
For my first card I used both the Large Die of the Month May 2020 and the Glimmer Kit of the Month for June 2020. I started out by die cutting and piecing together the large kaleidoscope image (from three different colors of cardstock).
After piecing everything together I cut a piece of white card stock down to 5 1/4 x 10 1/2 to make a 5 1/4 x 5 1/4 inch top folding square card. I then cut 4 mats out of different colors and types of cardstock. I then added the Congrats on your Special Day sentiment to the smallest fo the mats using the Glimmer Hot Foil Machine and Silver Glimmer Foil.
The largest mat was glued directly to the card base, with double sided foam tape being added to back of the next mat to add dimension. I placed a piece of thin silver ribbon on top before adding more double sided to tape to the die cut image mat combo which was placed on the top.
To add a bit of extra sparkle (couldn’t help myself) I used a clear glitter brush marker on the insides of the die cut pieces and then added flatback pearls for the finishing touch.


My second card uses the same sets as the example above. The primary difference is that I created used a standard A2 size notecard and changed up the color a bit by using teal for the foiled sentiment.


The final card came together the quickest. Once I decided on a layout I cut down a piece of white card stock to create a 5 1/4 x 5 1/4 top folding square notecard. I then cut out two mats glued them together, wrapped them with three pieces of black ribbon and attached them to the base. Using white card stock I foiled the large Thanks sentiment from the Glimmer Kit of the month for May 2020. I added double sided foam tape and placed the sentiment in the center of the card. Next I foiled the small sentiment from the same set and die cut the coordinating flowers out of black and mirrored card stock. I placed the sentiment and flowers and voila! I was done!

Thank you so much for stopping by. I hope that you have seen something here that inspires you to create your own little work of art. Until next time, don’t forget to spread kindness! – Ouma
Supplies
Need to find the products used to create this card? Most are listed below. Click on the icon below each picture to learn more. (This is NOT a sponsored post). All products were paid for by me. The post does however contain compensated affiliate links which can be used at no cost to you. Thank you so much for support!

