Hello! Today I am excited to share three projects that I created using the Trim A Tree Collection from Spellbinders. The collection includes the Layered Christmas Tree Stencil, the O Christmas Tree Etched Die set and the Shining Christmas Tree Hot Foil Plate and Die Set. My projects focus on the Layered Christmas Tree Stencil and the O Christmas Tree Etched Die set.

My first step was creating the trees. I placed the Layered Christmas Tree Stencil on top of a sheet of white Cardstock and then following the numbered guides I added shades of green using a blending brush and varying degrees of pressure. Next, I die cut all of the elements that would be used to create the scenes for each card. The tree outlines and full silouhettes were cut from white, green glitter and evergreen colored Cardstock.

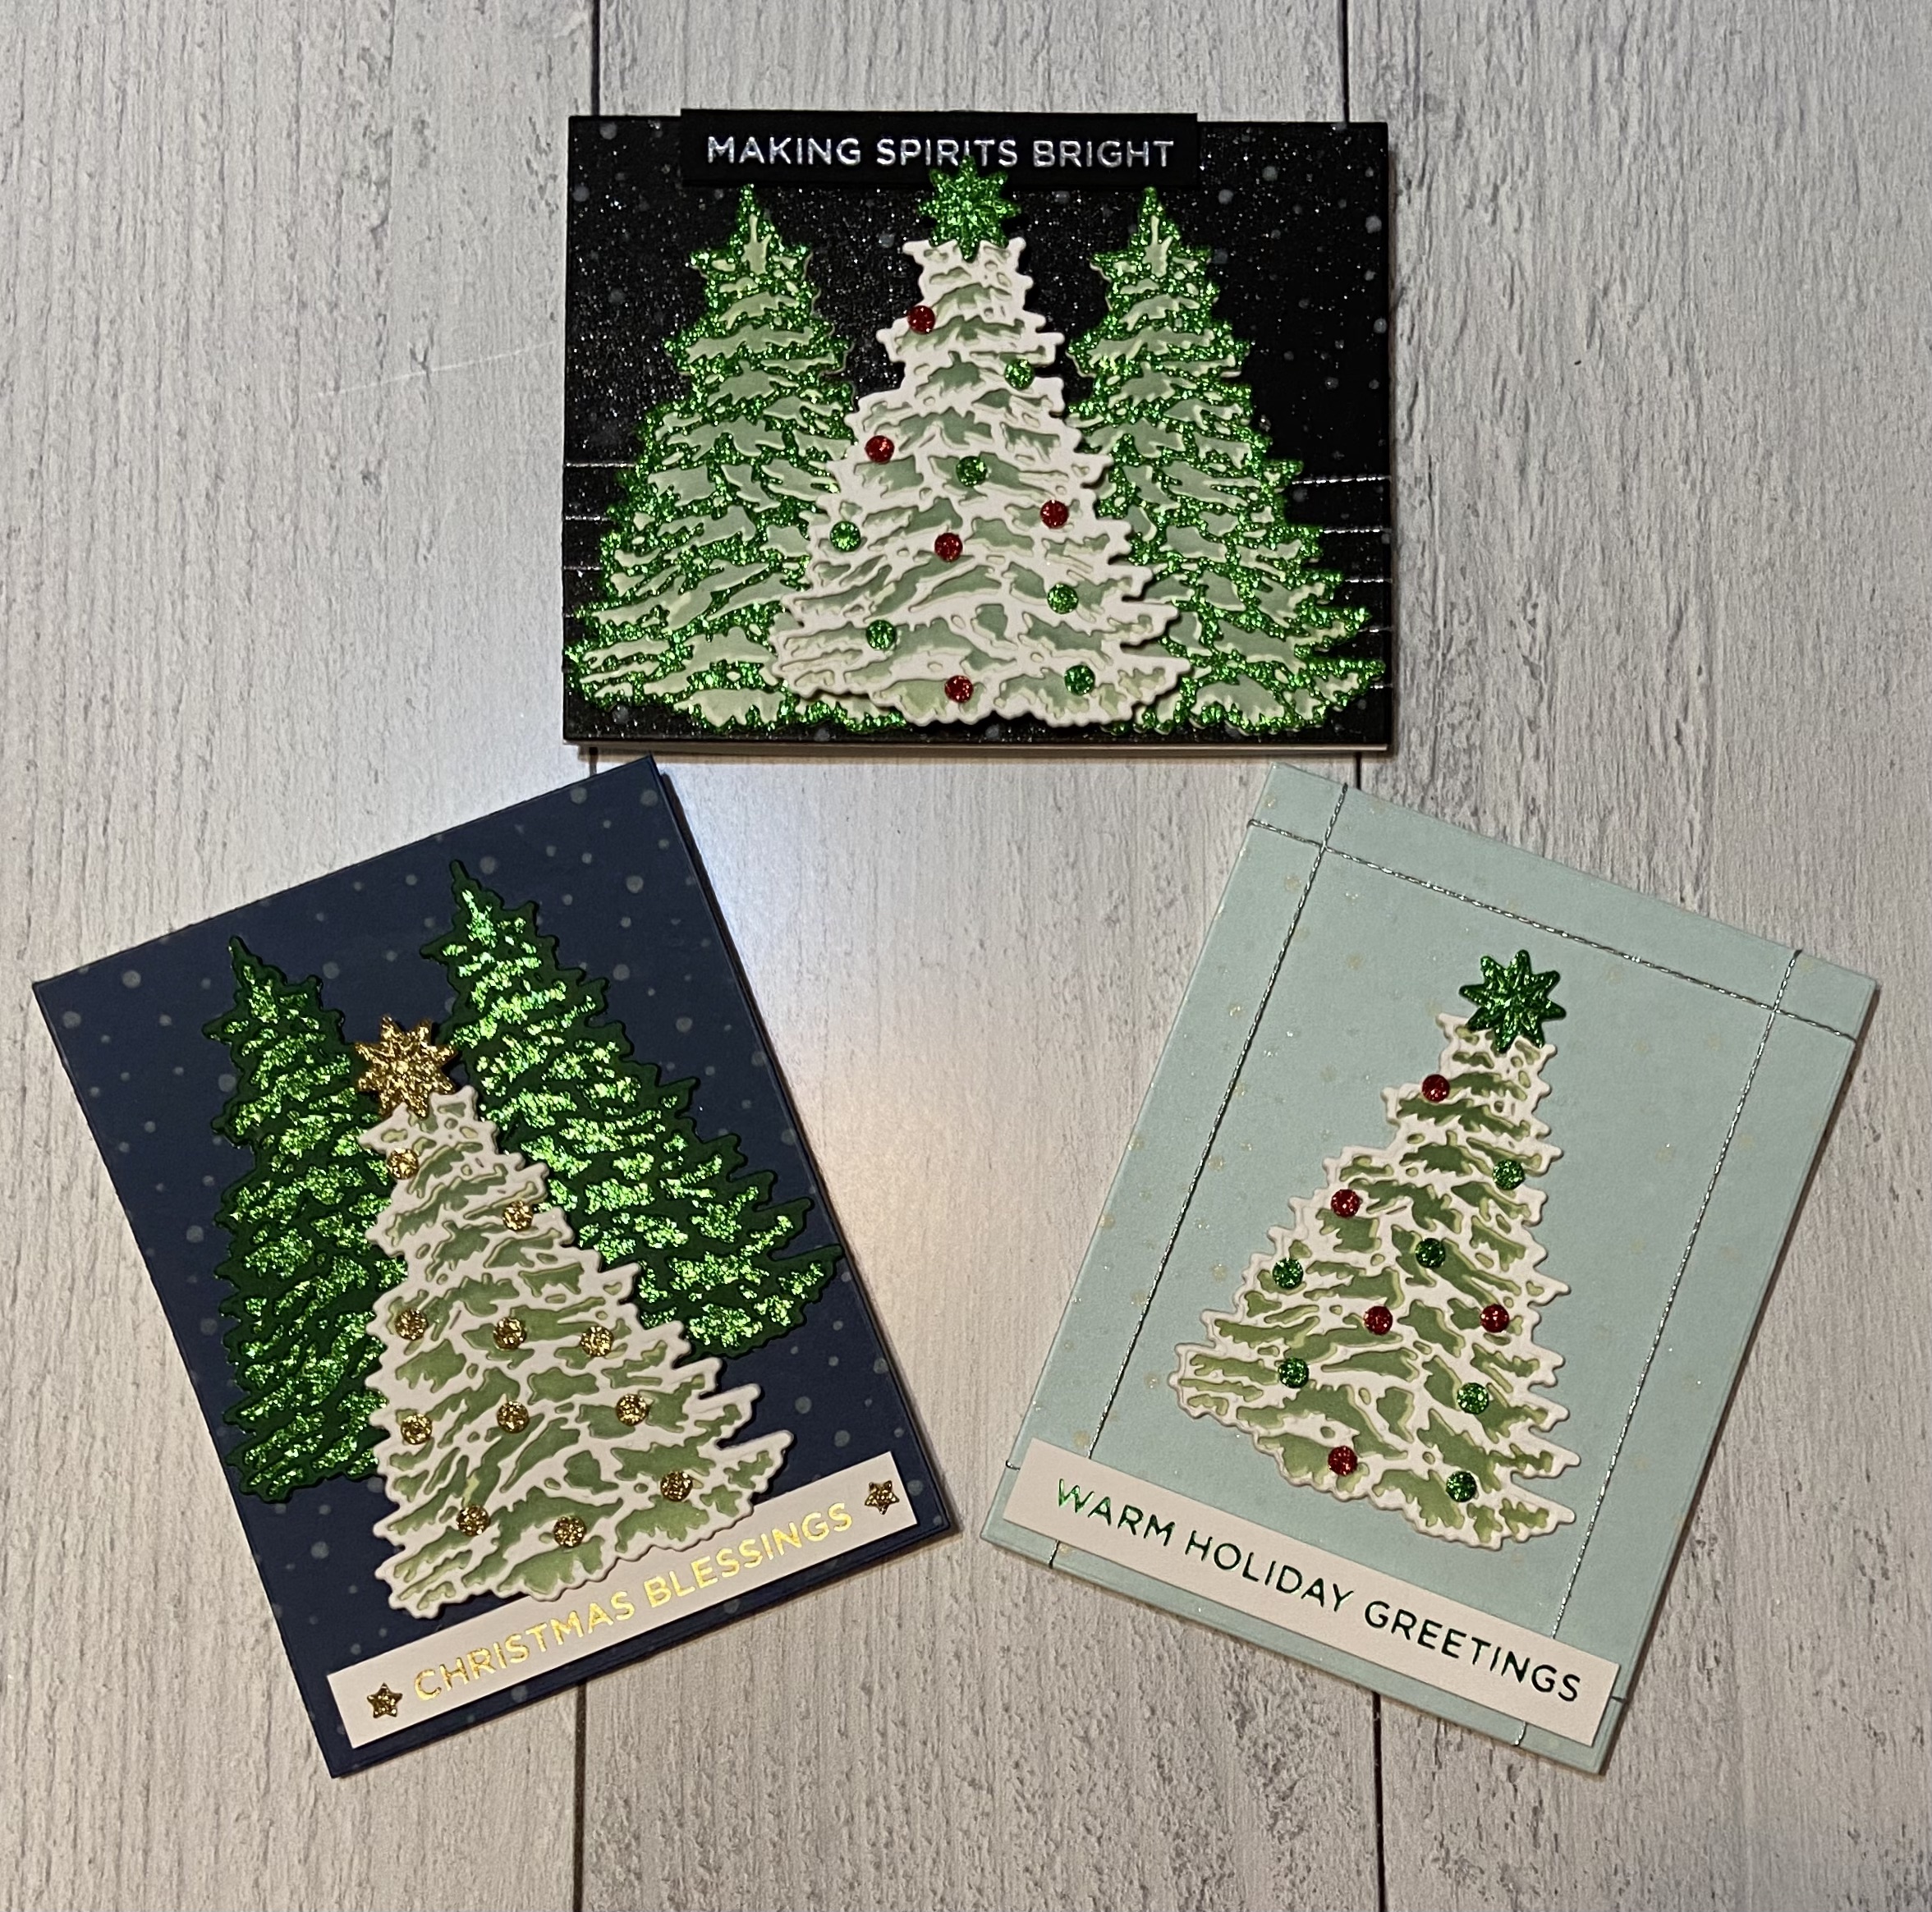
For the first card I chose a black background. I used white pigment ink and the Layered Christmas Tree Stencil to create the snowy background. After die cutting the background, I added a bit of shine using shimmer spray. Next, I wrapped silver twine around the background image and added double sided foam tape to the back before adding to an A2 notecard (turned on its side).

For the final element, I used a sentiment strip from the Shimmering Merry Christmas Sentiments (Glimmer Kit of the Month 11/19), combining it with silver glimmer hot foil and the same black Cardstock that was used for the background. This process was made super simple by using the Spellbinders Quick Trimmer.

The second card features a navy Cardstock background and snowy background created using white pigment ink and the Layered Stencil. For this card the background trees were cut from green glitter Cardstock with the outlines being cut from evergreen colored Cardstock.

The two green trees were adhered (flat) to the background with liquid adhesive. I added foam tape the the back of the white tree for dimension. Foam tape was also added to the back of the sentiment strip which was created using gold hot glimmer foil.

For the final card, the background was created using Sno Cone colored Cardstock and the Layered Tree Stencil. The snowy background was created using white pigment ink to which I add a bit of shine using a Wink of Stella. I wrapped silver twine around the background to create a “frame”. Foam tape was added to the background image and then placed on top of a top folding A2 sized card. Foam tape was also placed on the back of the green foiled sentiment strip.
There you have it! Thank you so much for stopping by and checking out my creations. I hope that you have seen something here that inspires you to create your own little work (or works) of art. Until next time, don’t forget to spread kindness! – Ouma

Supplies
Need to find the products used to create these projects? Most are listed below. Click on the icon below each picture to learn more. (This is not a sponsored post). All products were paid for by me. The post does however contain compensated affiliate links which can be used at no cost to you. Thank you so much for your support!

