Hello! Ouma here, and today I am bringing you a super cute holiday card plus a bonus mug and gift tags. I know…I know…It’s not even Halloween yet, but Christmas and the Holiday season will be here before we know it and I just couldn’t resist when I saw this die set. This polar bear is absolutely ADORABLE and most of all so easy to assemble.
This blog contains paid advertising banners and affiliate links (Shopping/Affiliate Disclosure). Banners and affiliate links may be used at no additional cost to you. This means that I may get paid a small commission when you shop with a company using a link I provide.
I am not paid by any company to use their products (all products used in my posts have been purchased – by me) and should this ever happen, I will disclose that in a specific post.
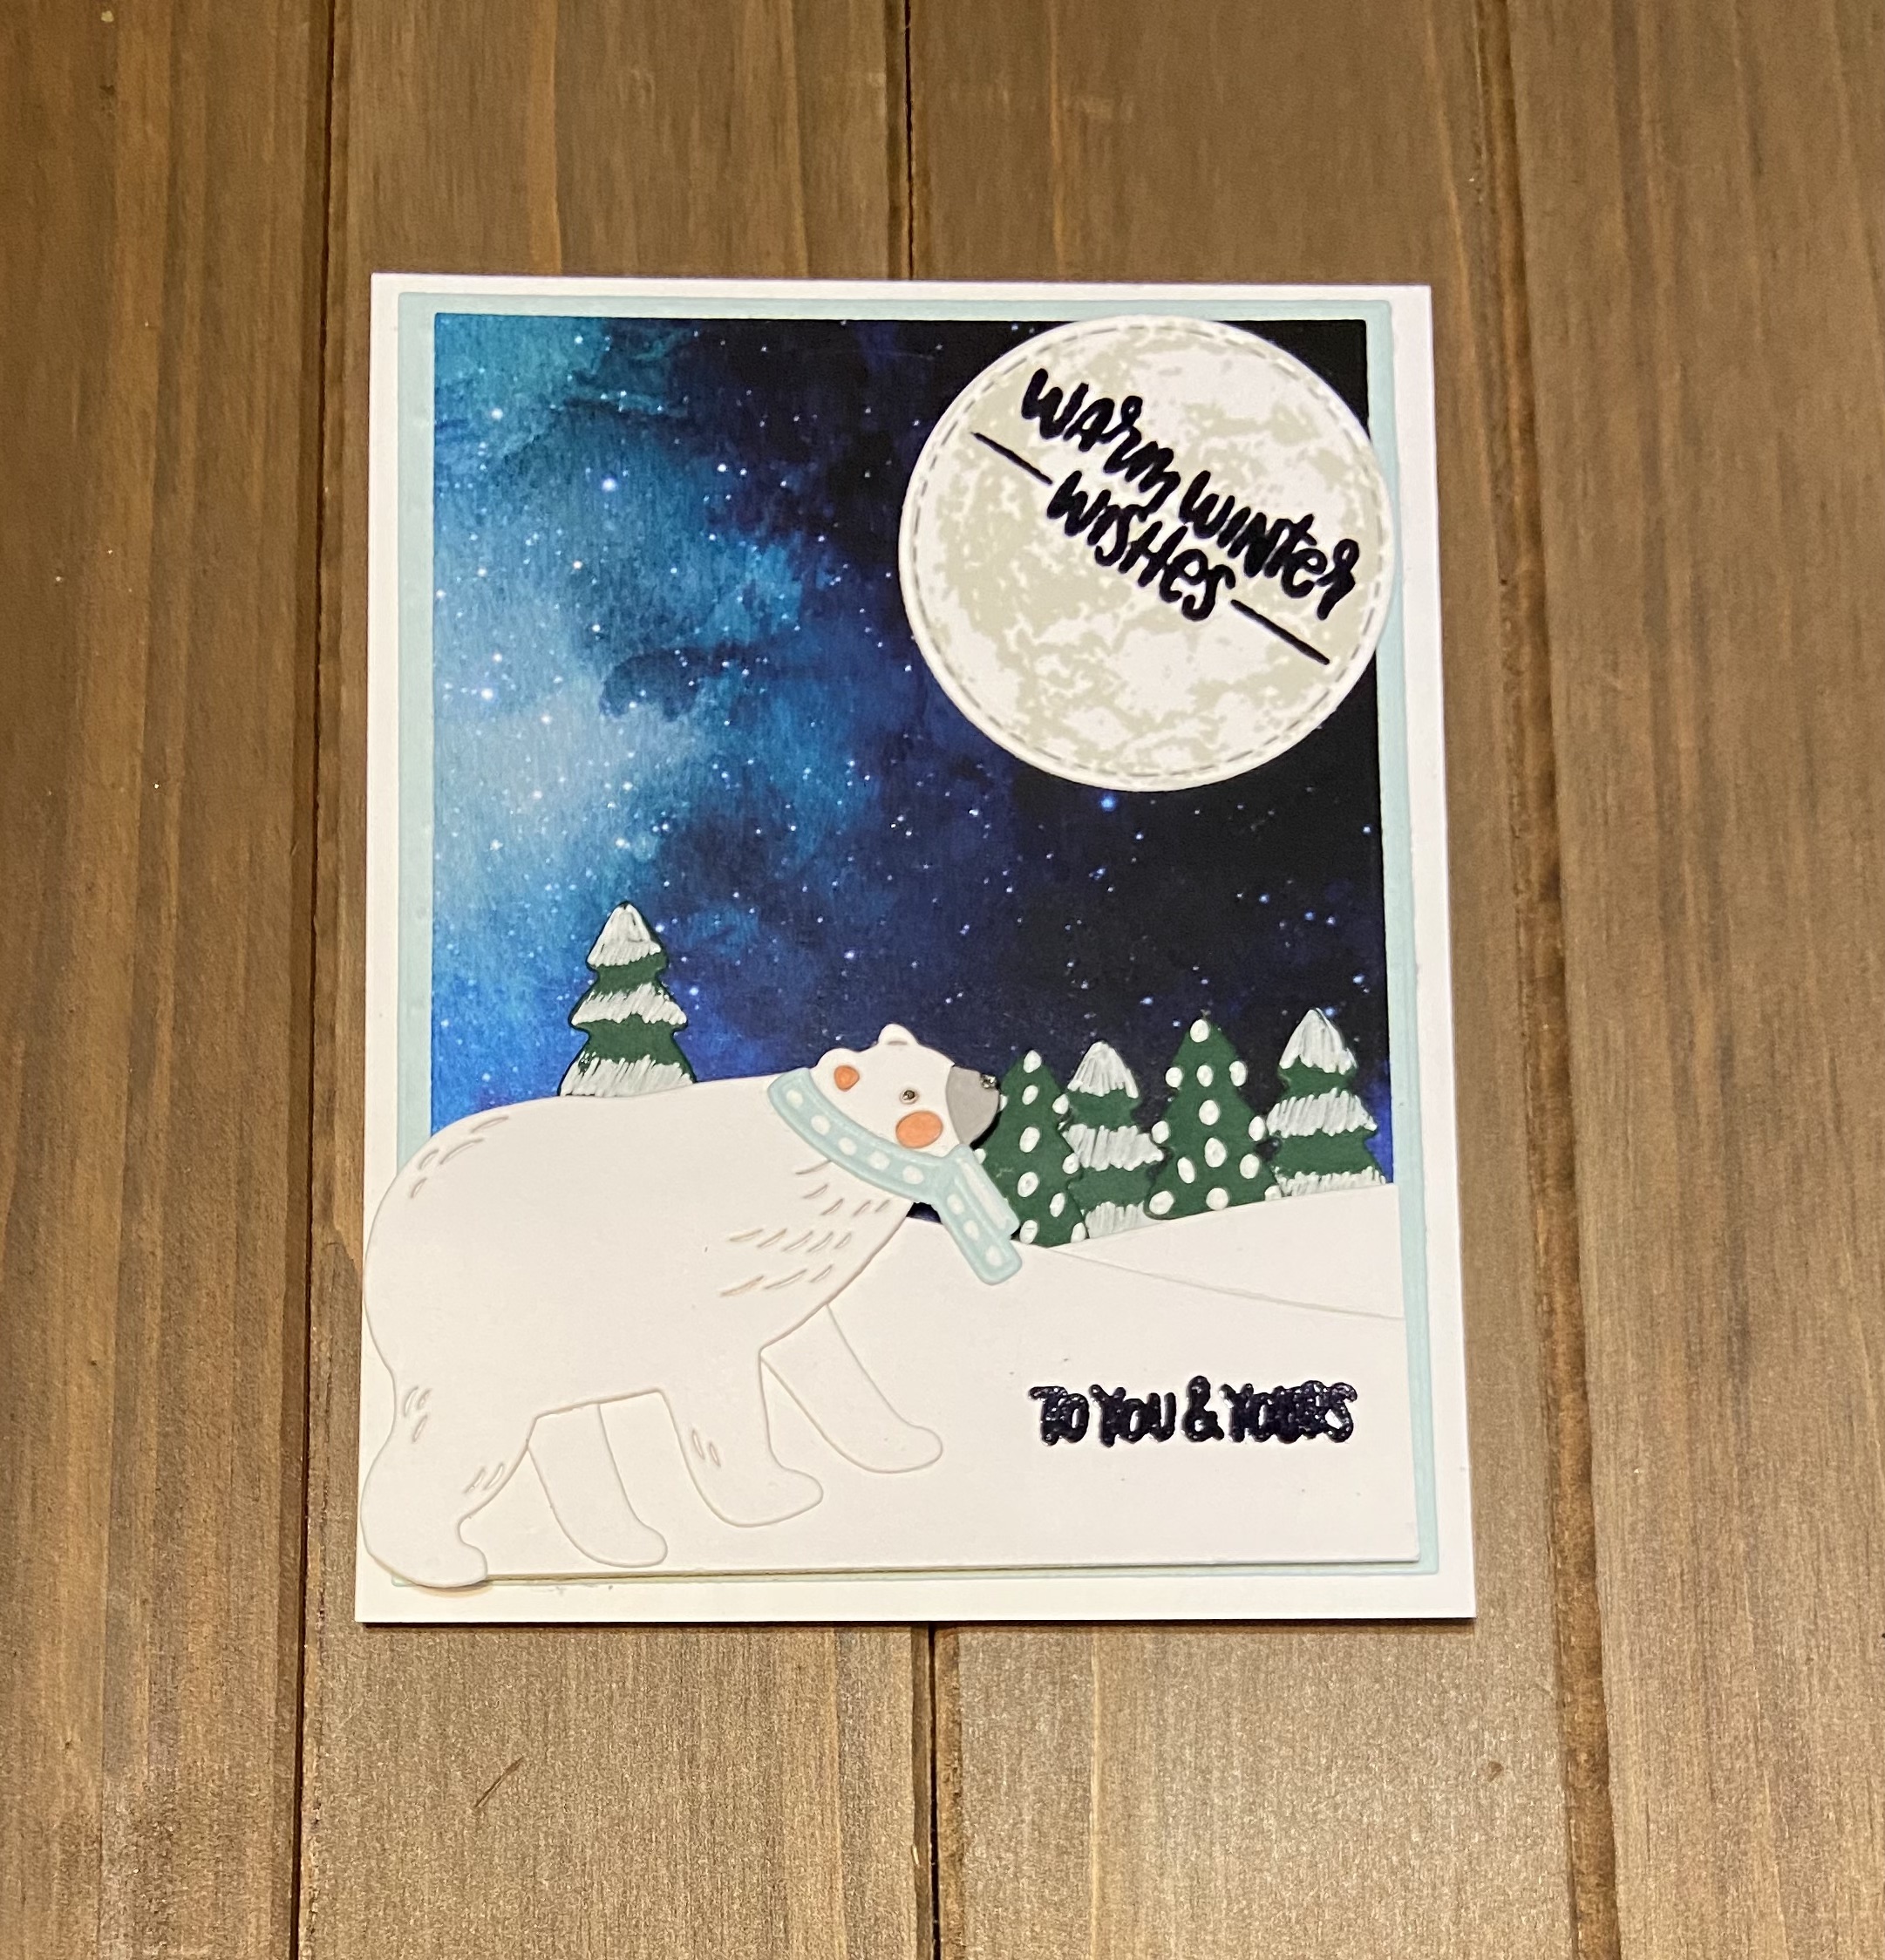
The STAR of today’s post is the polar bear from the Chill Bear Die set from Spellbinders. The die set is part of the Be Merry Collection that includes super cute, gnomes, snowmen and elves. Although the featured image is from the Chill Bear set, I pulled elements from other sets to bring everything together.

Before I started I knew that I was likely going to make more than one card plus gift tags. I like the idea of matching sets, so I cut four polar bears, four sets of legs and four scarves. The polar bear bodies, some of the snowflakes and the snowy hills were cut from heavy white Cardstock. The scarves were cut from Cranberry Cardstock and Sno Cone colored cardstock and the trees from Evergreen. The polar bear nose was cut from a piece of scrap grey Cardstock (not sure which brand – sorry!). A few trees and snowflakes were also cut from glitter Cardstock.
After cutting the polar bear bodies I added a base color of black (for the nose and eye) using a jet black artist marker. I then attached the grey “fur” using liquid adhesive. Color was added to the ear and cheek using a peach colored artist marker. Before attaching the scarf I added lines using a white Gelly Roll Pen.


After assembling the polar bears, I cut mats using the Sno Cone colored Cardstock as well as patterned paper from a Celestial Paper pack (check out my previous post that also uses patterned paper from this pack).

I used the Sno Cone colored Cardstock as the base and then layered the patterned paper on top. Both were placed on the front of a top folding A2 size note card.

To provide a bit of dimension, I added strips of foam adhesive to the backs of the “snowy hills”.

Foam adhesive was also added to the top portion of the polar bear with the bottom portion being secured with liquid adhesive.
Prior to securing the trees to the card front, I added dots and lines using the Gelly Roll Pen to give the appearance of snow. The trees were tucked behind the polar bear and hill (securing with liquid adhesive).

At this point I knew that I wanted a sentiment but wasn’t quite sure where I wanted to place it. After tossing around a few ideas I decide to heat emboss the Warm Winter Wishes sentiment (Critter Sweaters – no longer available) and cut it out using a circle die so that it resembled a moon. Initially it was all white. I asked my daughter for her opinion and she said yeah that’s cute but it needs something to make it really look like a moon. It was then that I remembered that I had a stamp set that would work!! I ended up stamping over (using Morning Frost colored ink) the embossed sentiment but it still turned out GREAT!
The final touch was to stamp and heat emboss the “to you and yours” sentiment (Christmas Cheer Stamp set) at the bottom.

These are the matching (semi matching) tags that I created using.

There you have it! Thank you so much for stopping by and checking out my creations. I hope that you have seen something here that inspires you to create your own little work (or works) of art. Until next time, don’t forget to spread kindness! – Ouma

Supplies
Need to find the products used to create these projects? Most are listed below. Click on the icon below each picture to learn more. (This is NOT a sponsored post). All products were paid for by me. The post does however contain compensated affiliate links which can be used at no cost to you. Thank you so much for your support!

